Ze Zoninator Guide
Ze Zoninator Guide | Zones
Introduction
In the dynamic world of digital content, effectively curating and managing articles is crucial for any WordPress site. Ze Zoninator is a powerful tool for editors and site managers, offering streamlined content management capabilities. This article explores how Zoninator can revolutionize your editorial workflow, enhancing efficiency and engagement.
What are Zones?
Zones are dynamic content areas where editors and site managers can display curated content. Unlike standard categories or tags, zones are custom groupings that allow for strategically showcasing posts based on specific editorial objectives.
They are versatile and can be used to highlight featured articles, trending topics, or thematic collections, making them particularly useful for sites with extensive content. Zones offer a way to keep the website engaging and fresh, as they can be updated frequently with new articles without manual intervention.
The real power of zones lies in their customization and integration capabilities. Zones can be placed in various parts of the website, such as the homepage or sidebars, offering flexibility in content strategy and audience engagement. This level of editorial control and dynamic content management makes zones an invaluable tool for effective website curation in WordPress.
Where do Zones live?
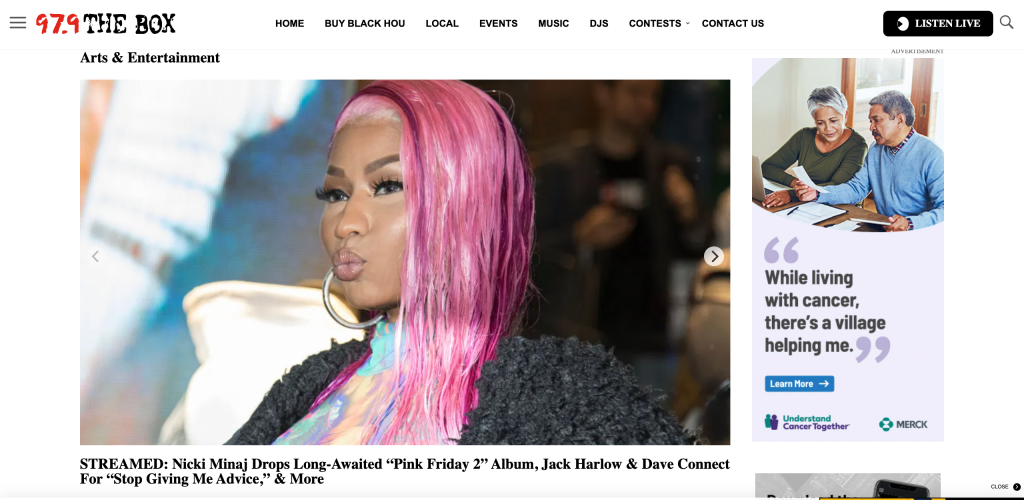
In the iOne Digital Ecosystem, Zones are typically displayed in prominent areas of a WordPress website to maximize visibility and engagement. Commonly, they are placed on the homepage, where they can showcase featured articles, latest news, or editor’s picks, immediately catching the attention of visitors.

Additionally, zones are often integrated into sidebars on blog and article pages, serving as a tool for highlighting popular posts. Their placement is strategically chosen based on the website’s design and the specific goals of content curation.
How to Create a Zone.
Creating a zone in WordPress using the Zoninator plugin is a straightforward process. Here’s a concise guide:
- Access Zoninator: In your WordPress dashboard, navigate to the Zoninator area, typically found in the left-hand menu.
- Create a New Zone: Click on the option to ‘Add New Zone’. Enter a name for your zone that reflects its purpose, like ‘Featured Articles’ or ‘Latest News’.
- Add Content to the Zone: Once the zone is created, you can start adding posts. This can be done by searching for specific articles or selecting from a list of recent posts. Simply drag and drop the posts into your zone.
- Organize Your Zone: Arrange the posts in your desired order. Zoninator allows you to easily reorder the content by dragging and positioning each item.
- Save Your Zone: After organizing the content, save your zone. It’s ready to be displayed on your website in the predefined areas set by your theme or design.
Managing Zones
Note: It is highly recommended that Zones use naming conventions (e.g., “Homepage DL Zone”) so that they can be easily identified.
Organizing Zones
Organizing zones in Zoninator is a key aspect of managing your curated content effectively. Here’s how to do it:
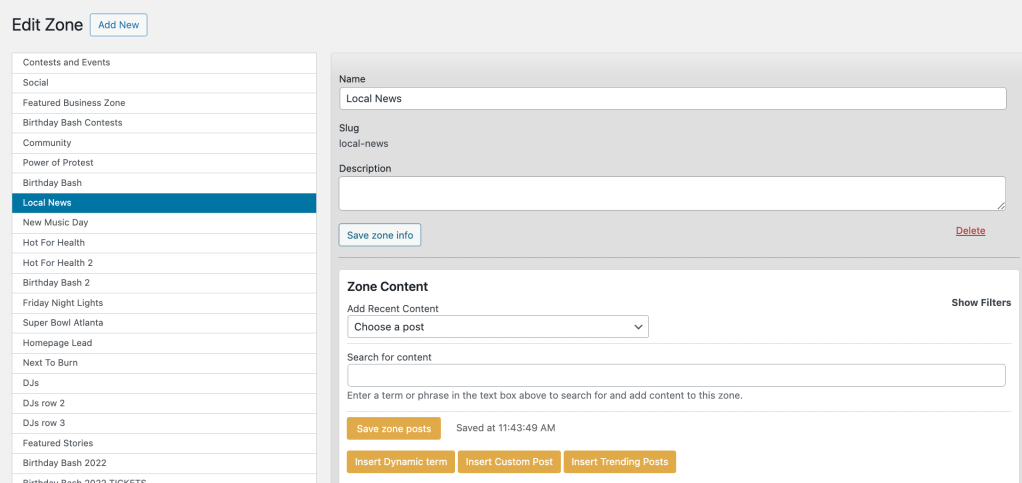
- Access the Zone: Go to the Zoninator section in your WordPress dashboard and click on the zone you want to organize.
- Reorder Content: Within the zone, you’ll see a list of the current posts. To reorder these posts, simply drag and drop them into your preferred sequence. This feature is particularly useful for prioritizing content based on timeliness, relevance, or editorial strategy.
- Add or Remove Posts: To add new posts, search for them using the provided search functionality and then add them to your zone. If you need to remove posts, you can do so by clicking a remove or delete option next to the post within the zone.
- Save Changes: After reordering or updating the content, save your changes to ensure that your zone reflects the latest organization on your site.
Deleting Zones
There may be instances where you need to delete a zone. This process is just as straightforward:
- Locate the Zone: In the Zoninator dashboard, find the zone you wish to delete.
- Delete Option: Each zone typically has an option to edit or delete. Click on the ‘Delete’ option for the zone you want to remove.
- Confirm Deletion: You will likely be prompted to confirm your decision. Remember, deleting a zone is permanent and will remove all the curated content settings associated with that zone.
- Update Your Site: After deleting a zone, ensure that your website’s layout and content display are still coherent and that there are no empty or broken sections where the zone used to be.
Zone Features
1. Reordering Posts
- Zoninator zones allow for easy drag-and-drop reordering of posts. This feature enables editors to prioritize content based on relevance or editorial strategy, with changes reflected immediately on the site.
2. Scheduling Content
- Editors can schedule when posts appear and are removed from a zone, facilitating timely content rotation and alignment with editorial calendars. This feature is essential for managing time-sensitive content.
3. Most Recent List and Filtering
- The plugin offers a ‘Most Recent’ list to quickly access the latest posts. Additionally, a filtering option is available, allowing editors to sort this list by categories and timeframes (e.g., ‘All Posts’, ‘Yesterday’, ‘Today’), enhancing the efficiency of content curation.
These features combine to provide a powerful and flexible tool for content management, ensuring that Zoninator zones are not only user-friendly but also highly effective in maintaining an engaging and relevant website.
iOne Digital Zone Special Features for Enhanced Flexibilty
1. Dynamic Term Zones
- Automated Content Refresh: The “Dynamic Category Zone” is a standout feature that automatically populates with new content based on specific taxonomies like tags or categories. This automation means the zone refreshes as new content is published, eliminating the need for manual updates.
- Customizable Parameters: Editors can set various parameters: the taxonomy type (tags or categories), the specific taxonomy name, the number of posts to display, and an offset feature for starting the feed from a specific point.
- Offset for Unique Content Streams: The offset is particularly useful for creating multiple, non-duplicating content streams. For example, two zones can display ‘news’ but with different sets of articles by using the offset parameter to skip posts in the second zone.
2. Custom Posts for External Promotions
- Promotional Flexibility: This feature allows the creation of custom posts, designed with external promotions in mind. Unlike standard posts, these can be tailored with custom elements like images, external URLs, excerpts, categories, and authors.
- Seamless Integration: Custom posts integrate seamlessly into zones, appearing like regular posts. This allows for the promotion of external content or special offers directly within blog feeds, without needing to create and redirect from a standard article.
3. Trending Posts Zone
- Real-Time Trending Content: The trending posts zone is dynamically populated with content deemed ‘trending’ according to Parsely analytics.
- Customizable Display Options: Editors can set the number of trending posts to display, use the offset feature to skip certain posts, and define a timeframe for trending content based on a set number of days.
- Automated Content Curation: This feature ensures that the most engaging, trending content is automatically highlighted, keeping the website’s content fresh and relevant without daily manual intervention.
These custom features in Zoninator significantly enhance the flexibility and dynamism of content zones, reducing the need for daily manual updates and allowing for more strategic, automated content curation.
Configurations
Basic Configurations with Standard Zone Features
1. Editor’s Choice Zone
- Objective: Highlight editor-selected articles.
- Configuration:
- Zone Name: “Editor’s Choice”
- Content Source: Manually curated by editors.
- Number of Posts: 5 for focused attention.
- Ordering: Custom order set by editors.
- Placement: Main section of the homepage.
- Usage: Showcases top picks or must-read articles.
2. Recent Posts Zone
- Objective: Display the most recent articles.
- Configuration:
- Zone Name: “Recent Posts”
- Content Source: Manually Selected?
- Number of Posts: 10 for a comprehensive list.
- Ordering: Chronologically, newest first.
- Placement: Sidebar on blog pages.
- Usage: Keeps content fresh and up-to-date.
3. Category Highlight Zone
- Objective: Focus on a specific content category.
- Configuration:
- Zone Name: “Tech Spotlight” (assuming ‘Tech’ is the category)
- Content Source: Manually selected posts from the ‘Tech’ category.
- Number of Posts: 6 to maintain category focus.
- Ordering: Based on relevance or popularity.
- Placement: Dedicated section on the homepage or tech page.
- Usage: Highlights a niche or area of special interest.
Advanced Configurations
1. Dynamic News Feed
- Objective: Continuously update with the latest news.
- Configuration:
- Zone Name: “Breaking News”
- Content Source: Dynamic Term Zone set to “News”.
- Number of Posts: 5 for immediate impact.
- Ordering: Automatically updated with new posts.
- Placement: Top of the news section.
- Usage: Provides real-time news updates.
2. Promotional Content Zone
- Objective: Display custom promotional posts.
- Configuration:
- Zone Name: “Special Offers”
- Content Source: Custom posts with promotions.
- Number of Posts: 3 to avoid clutter.
- Ordering: Curated based on campaign priorities.
- Placement: Sidebar or between article sections.
- Usage: For marketing or affiliate promotions.
3. Trending and Time-Sensitive Zone
- Objective: Showcase trending content within a specific timeframe.
- Configuration:
- Zone Name: “This Week’s Hot Topics”
- Content Source: Trending posts according to Parsely, within the last 7 days.
- Number of Posts: 8 for a diverse range.
- Ordering: Based on trending metrics.
- Placement: Special section on the homepage.
- Usage: Engages users with what’s currently popular.
Keep in mind that you can combine all of these methods for some truly dynamic zones!
Best Practices Summary / Advice
Best Practices and Advice for Using Zoninator Zones
1. Align Zones with Editorial Goals
- Understand Your Audience: Tailor zone content to match the interests and preferences of your audience.
- Set Clear Objectives: Each zone should have a specific purpose, whether it’s to highlight featured content, showcase latest news, or promote special offers.
2. Keep Content Fresh and Relevant
- Regular Updates: Regularly update zones to ensure content remains fresh and engaging. This is crucial for zones like ‘Latest News’ or ‘Trending Topics’.
- Balance Evergreen and Timely Content: Mix evergreen content with time-sensitive posts to maintain a balance that keeps all readers engaged.
3. Optimize Zone Placement and Design
- Strategic Placement: Place zones where they are most likely to be seen and interacted with, such as the homepage or main navigation areas.
- Consistent Design: Ensure the design of zones is consistent with the overall website aesthetic. Zones should enhance the user experience, not disrupt it.
4. Utilize Dynamic and Custom Features Effectively
- Leverage Automation: Use dynamic zones to automate content updates where appropriate, reducing manual effort.
- Custom Posts for Promotions: Utilize custom posts feature for promotions or external content, ensuring they blend seamlessly with regular content.
5. Monitor and Analyze Performance
- Track Engagement: Use analytics tools to monitor how visitors interact with the content in different zones.
- Adjust Based on Insights: Be prepared to adjust your strategy based on what content performs best. This might mean changing the type of content featured or the placement of zones.
6. Ensure Easy Navigation and Accessibility
- Clear Labels: Use clear and descriptive names for zones to help users navigate and understand the content easily.
- Accessibility: Ensure that zones are accessible, with proper alt text for images and readable fonts for text.
7. Educate Your Team
- Training: Provide training for your team on how to use Zoninator effectively, especially if they are involved in content curation.
- Share Best Practices: Encourage sharing of insights and strategies among team members to continually improve how zones are used.
Common Issues / How to troubleshoot / FAQ
First issue that comes to mind for me is why a post in a zone isn’t appearing on the front end. Chances are that article is being used
Conclusion
In wrapping up this guide, it’s evident that Zoninator is an essential tool for any WordPress site focused on dynamic content management. Its ability to create, manage, and display content through versatile zones transforms how articles are curated and presented, aligning perfectly with your editorial goals.
Zoninator’s features, from automated content refreshes in Dynamic Category Zones to the strategic placement of trending posts, empower editors and site managers to keep their websites engaging and relevant. The ease of scheduling content, reordering posts, and integrating custom promotional material ensures a seamless and impactful user experience.
Remember, the key to leveraging Zoninator effectively lies in aligning zones with your site’s objectives, maintaining fresh content, and optimizing placement for maximum engagement. Regular monitoring and adjustments based on analytics will keep your content strategy sharp and effective.
Embrace Zoninator as your tool for crafting a compelling digital narrative, making your WordPress site not just a platform for articles, but a curated experience that resonates with your audience. With Zoninator, your site is poised to be a dynamic, engaging, and evolving digital destination.
